Lamb Chops and Brussel Sprouts

Tonight I used a recipe from The Paleo Approach Cookbook. I’ve always had an aversion to lamb but I decided to try something new because I’m getting bored with beef and chicken. 

The lamb chops are seasoned with garlic, oregano and lemon zest then broiled for 6 minutes on each side.  I’d say these turned out perfectly. Now I can also say I love lamb!

For a side I cooked Brussel sprouts on a bit of olive oil with two gloves of crushed garlic. 

image

I’ve been really good with sweets fire the last 3 weeks. By good I mean I haven’t had any treats, and only naturally occurring sugar in fruits.  Tonight I’m making a molten lava cake that I used to make for friends. I’ve never made a paleo version so hopefully these turn out well!  Pictures to follow!

New recipe!

I to try something new and use the end bits of what I have left from my last trip to the grocery store.  I present to you Maple Bacon Apple burgers!

Maple Bacon Apple Burgers
3 pieces of bacon cooked and chopped up small
1 red apple peeled and diced
1/2 tbsp grade b maple syrup
1 lb grass feed organic ground beef

Combine all ingredients into a bowl and make 4 patties. Grill or pan fry and enjoy!

Many people ask what I use to make my meat patties hold together.  Nothing!  If you pack the meet right enough together you should need to add anything to make them stick.  Besides,  since mine aren’t going into a bun it doesn’t matter if they’re perfect.

image

Kombucha Brewing: Phase II

My Kombucha was finally ready to bottle.  After 7 days of fementation,  the taste is perfect and I didn’t want to alter it so I went ahead with bottling.  3-4 more days and it will be ready to drink!

image

Here’s my scoby and my new baby scoby.

image

Look at all that yeasty goodness!

Spinach and Dark Cherry Juice

My chiropractor told me to try this juice.  I was skeptical but oh my goodness it is so delicious! 

1-2 cups frozen spinach
1/2 frozen dark cherries
3/4 can of coconut water

image

Blend together in blender and enjoy!  I use a single serving cup on my Ninja blender.  A magic bullet works well too.

image

Buying frozen spinach can be expensive.  You can buy it fresh and freeze it in an ice cube tray with the coconut water which is easy for just tossing in the blender!

Breakfast batch cooking

I made a root vegetable breakfast hash to get me through the week.  I have early clinic hours this week so I need something quick, easy and nourishing to get me through the hectic day.

Root Vegetable Breakfast Hash
4 servings
1 large sweet potato cubed
1 rutabaga cubed
2 parsnips sliced small
1/2 red onion
Rosemary minced
Oregano
Thyme
Salt
Pepper
2 tbsp extra virgin olive oil

Combine diced/cubed root vegetables into a pot of boiling water. Cook for about 10-15 minutes.  You want the roots to be soft but not mushy.

While the root vegetable are boiling,  combine the seasoning and the onion in a skillet with 1 tbsp extra virgin olive oil. You can cook the onion to you liking,  I carmelize them which reduces the FODMAP, but still allows me to eat onions. 

image

Pull the roots from the water and strain them.  Next,  add the roots to the cooked onions in the pan along with the second tablespoon of olive oil.  Again,  cook to your liking.  I like mine crispy to I cook them to a nice and crispy golden brown. 

image

Package and enjoy!

image

Note: I’m currently doing some research on why certain starchy roots are ok while others are not.  I’ll let you know when I find out!

Tonight’s dinner was simple. I cooked up a grass fed organic top sirloin, purple cauliflower and golden beets.  This was a fun and colorful dish!

image

For the steak, I put 1 tbsp olive oil and 1 tbsp white wine vinegar in a pan and added the steak. I seasoned the steak with rosemary, oregano, thyme, salt, and pepper. I don’t make my spices ever. I think it turned out perfectly.

The cauliflower and beets were unseasoned and boiled. I threw the beets in the hot pan to give them a nice brown and flavorful finish as they were leftover from the other night and I don’t use a microwave to reheat my food.

Purple cauliflower is a fun addition to any meal. It gets its color from the antioxidant anthocyanin which is the same thing that makes red wine red!

image

Spring is here!

A trip to the market revealed beautiful blossoming trees shading the gorgeous bright blue sky!

image

Also,  here are some other projects I’ve been working on:
Dehydrated fruits for hiking and mid day snacks.  These really help me ward off the sugar cravings.

image

I also made some gummies to snack on.

image

Strawberry lime gummies:
2 cups strawberries
6 Tbsp gelatin (pasture raised organic)
2 tbsp maple syrup
2/3 cup lime juice
Blend the strawberries, lime juice and maple syrup into a juice.  Heat the juice mixture in a small sauce pan.  When it is warm (just streaming, don’t let it boil) stir in the gelatin.  Once the gelatin is dissolved pour the mix until silicon ice cube trays and refrigerate at least one hour.  Because I do my cooking at night I let them sit over night and they are perfect by morning!

AIP in the Desert

Desert season has officially begun! While normally I would pig out on chips, burger, fries, and beer while adventuring in the desert, this time that was not an option. With some solid pre-planning we were able to prepare some stellar meals at our isolated desert campground. DSCN2633

For dinner the first night after a day exploring Goblin Vally and Carmel Canyon I cooked steak and bacon wrapped asparagus. Wrapping the bacon was actually a last minute decision, we bought it for breakfast but we were starving so we decided to us it with dinner too. It was the best decision of the day.

DSC_0041

For breakfast the next day we had bacon and sweet potato hash browns. I was skeptical about the hash browns but it turns out they were AMAZING. This meal gave us enough carbs and protein to complete a six hour hike through Little Wildhorse Canyon.

20150315_085917 (1)

It was a lot easier to do AIP while camping than I thought. We stuck with dehydrated fruits and veggies for the hikes and some jerky. I never felt like I didn’t have enough fuel which has always been my biggest concern. I have high hopes for the adventures ahead that I’ll be able to keep my body healthy.

Enjoy some pictures of our adventures through the desert!

Goblin Valley

DSCN2627

Little Wildhorse Canyon

DSC_0123

DSC_0109

DSCN2675

Slot Canyon Bouldering

DSCN2671

Super Excited Faces!

DSCN2646

DSCN2644

Beautiful Desert Evening

DSC_0051

Good days and bad.

Thank goodness the good days finally outweigh the bad. Something I ate has not been friendly today so their probably won’t be any spectacular food postings. I’m still learning (the hard way) what I can eat and what I am sensitive too. In the mean time, I’m going to put this here. I must make this later.

The Mother Has Arrived – Kombucha Home Brewing

If you’ve never had Kombucha before, it is a fermented pro-biotic tea with a ton of healthy benefits. It is full of antioxidants, vitamins and acids that contribute to a healthy digestive tract. With an autoimmune disease a healthy gut is a happy body so Kombucha has become an important part of my diet. It’s incredibly good for you and because of it’s increasing popularity you find it at just about any grocery store. I chose to start brewing my own because I drink enough of it that it is more cost effective this way. Plus, it’s a fun project!

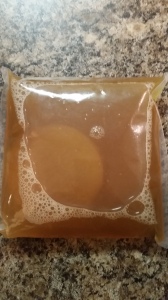
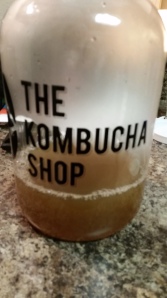
I got the scoby aka mother in the mail today from The Kombucha Shop and got to brewing right away. The scoby is a Symbiotic Culture of Bacteria and Yeast that allows the tea to ferment into the fizzy and tangy drink that is Kombucha.

The ‘mother’:

20150311_183223

The process was easy to follow and there were fewer steps involved than I thought there would be.

Step One:

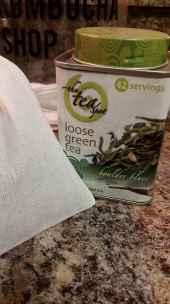
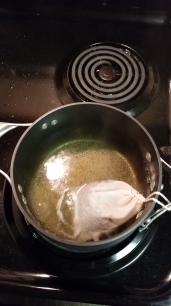
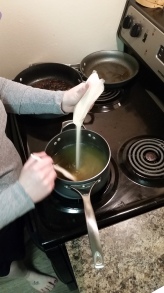
Brew some tea. To be more specific, 4 cups of boiling water and 3 tablespoons of loose leaf tea. I used Boulder Blues tea from The Tea Spot in Boulder, Colorado because this is my all time favorite tea. I’m not sure how well this tea will work as they recommend using a pure black, green, oolong, or ceylon tea but there are no additives or oils in this so I’m sure it will be ok.

20150311_192320 20150311_192450

Step Two:

Once the tea has steeped 5-6 minutes, add 1 cup organic refined sugar and stir until dissolved.

20150311_192943

Step Four:

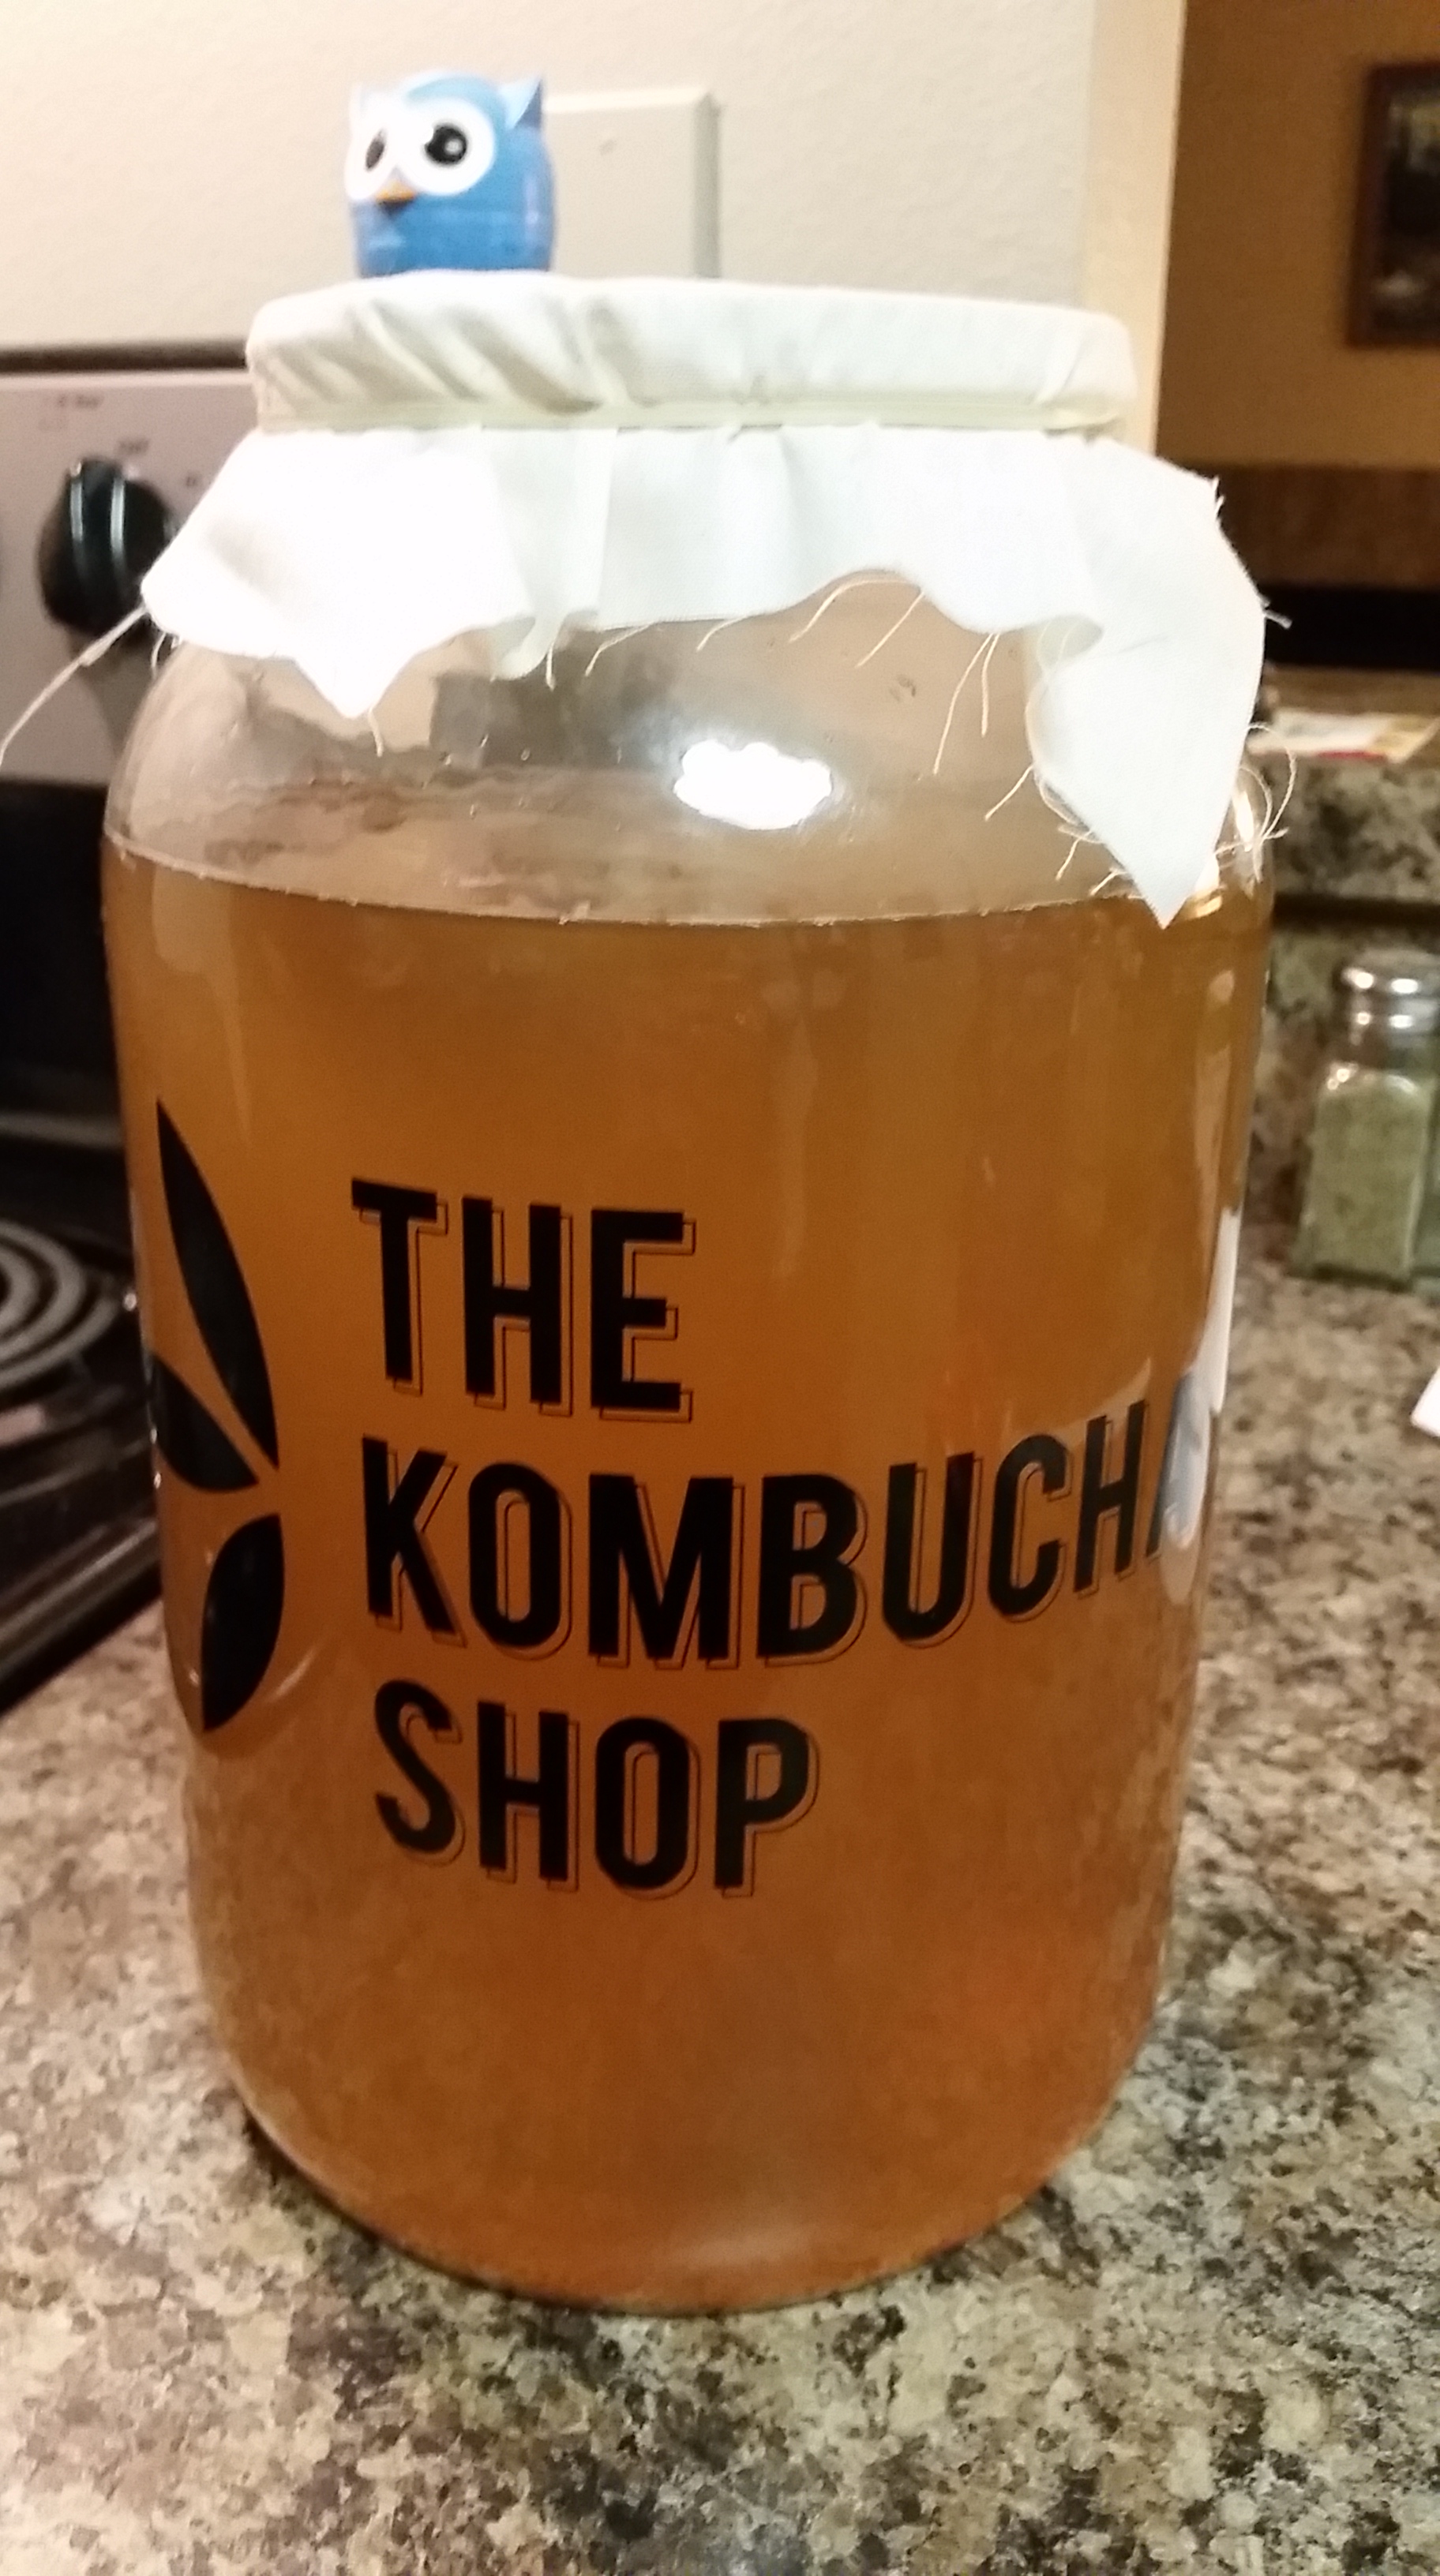
Pour the sweet tea mixture into the brewing jar and add cold filtered water stopping three inches from the top of the jar. (you need to leave enough room for the mother!)

20150311_193638

Step Five:

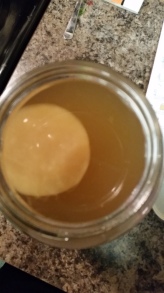
Carefully add the scoby aka mother to the jar. After giving it one gentle stir cover with a clean breathable cloth and seal with a rubber band. You can use a linen towel, several layers of cheesecloth, or cotton.

20150311_194014 20150311_194208

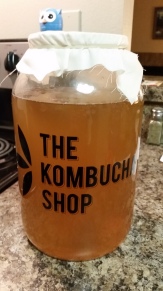
A couple of things to keep an eye on for the brewing process:

You want your brew to maintain a temperature of 68* – 88* F otherwise it will mold.

Do not disturb your brew for at least seven days. Set it somewhere out of direct sunlight and leave it there undisturbed.

Optimal pH balance is 4.5, it is not necessary to test this but it is nice to know where your Kombucha is at.

This is the most basic form of Kombucha brewing I found and it was made even easier because it was a kit. You can buy the kit at The Kombucha Shop or on Amazon (there are more varieties online). If you are really ambitious you can make it on your own without a kit. Micky Trescott has a recipe for it here.